
How To Insert a Vertical Line In Word | Complete Guide [2024]
Lines are one type of design feature that can divide a document into sections or direct the flow of content. Reader convenience and readability can both be enhanced by these minor adjustments. Mastering these Microsoft Word design features will make your work look clean and understandable for personal and business use. In this post, we’ll go through the many tools available in Microsoft Word to insert a vertical lines.
How to insert a vertical line in Word using a bar tab
Using the bar tab, you can make vertical lines and divide your paragraphs into columns. The following steps will assist you to insert vertical line:
- Select a paragraph.
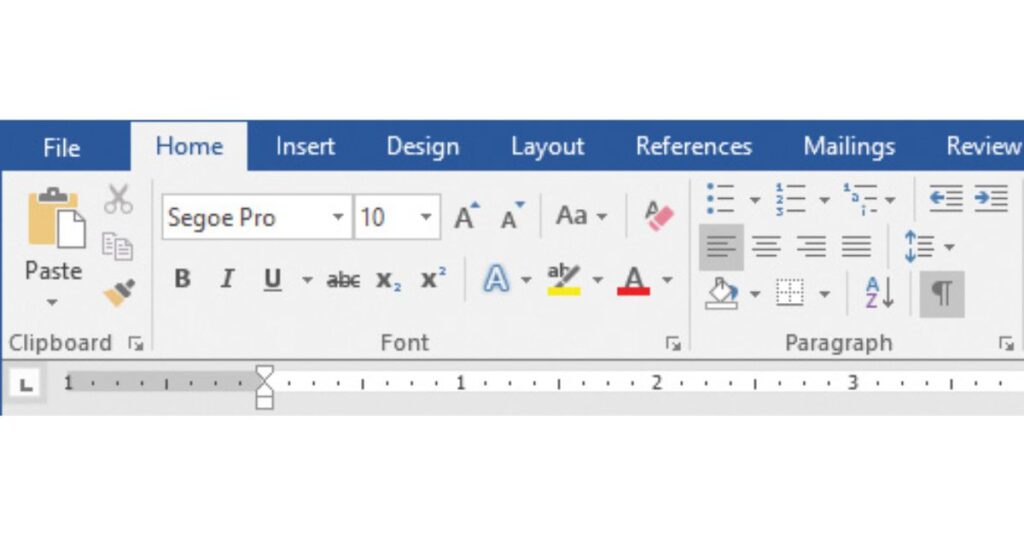
- Click the small arrow in the lower right corner of the “Paragraph” section on the “Home” tab. This opens a dialog box with the “Paragraph Settings” on it.
- Choose the “Tabs” button located in the dialogue box’s bottom.
- Enter the dimensions of the location where you want the vertical line to appear in the “Tab Stop Position” box. To help you in locating the value to enter, use the ruler located at the top of the page.
- In the “Alignment” section, click the “Bar” button and choose “Set” and “Ok.” Your vertical line now appears where you wanted it to.
- To remove the vertical line, delete the “Bar” tab.
How to insert vertical lines using “Borders”
Here are other options to add a line to your documents by clicking the “Borders” tab. To guide you to insert vertical lines using “Borders” button, follow these steps:
- Choose the paragraph where the line is to appear.
- On the “Home” tab, select the “Borders” button. This inserts a line below the text you have chosen. The horizontal line at the bottom acts as the default border.
- To enter the drop-down menu and adjust the line’s location or orientation, select the arrow located on the “Borders” button.
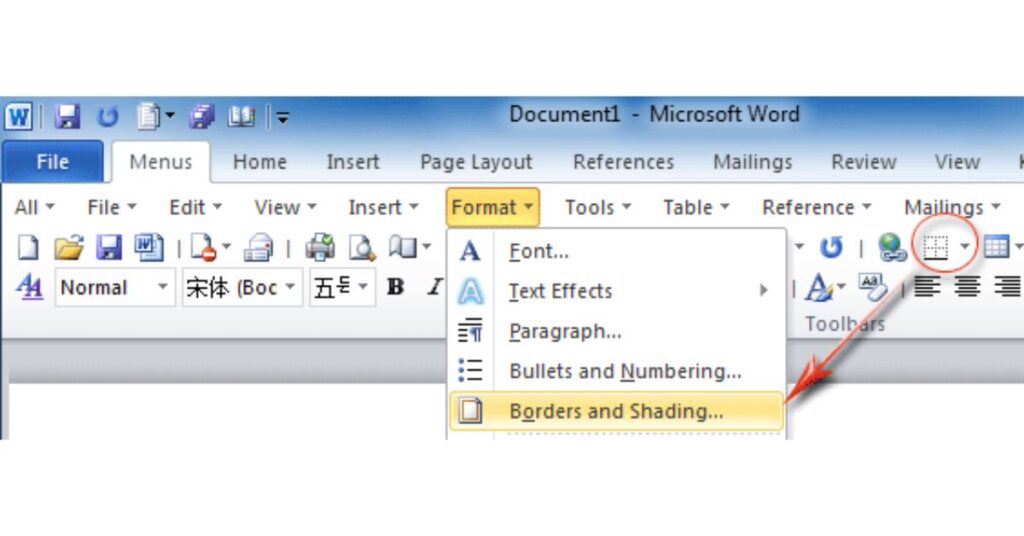
- To bring up a dialog box, choose “Borders and Shading” from the bottom of the menu. Here, you can alter the line’s color, width, height, and style.
How to insert a vertical line using “Shapes”
The following steps will assist you in inserting a verticle line in Word by using “Shapes:”
- Create a new Word document. To do this, select “File” and then “New.”
- In the ribbon, select the “Insert” tab. This tab is next to the “Home” tab.
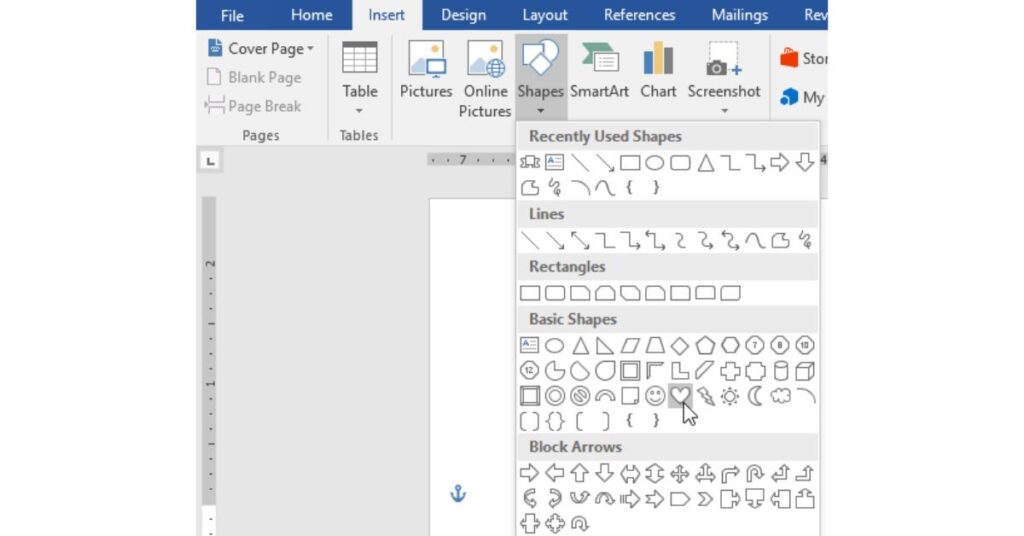
- Select “Shapes” from the “Insert” tab toolbar. This is located in the toolbar’s “Illustrations” section.
- From the drop-down menu that opens, choose a line shape. This menu’s “Lines” heading is displayed.
- Using the line template you chose, draw a line anywhere on your document. Click anywhere on your page, drag it to the desired location, and then click again to draw a line.
- Click and drag the circles at each end or in the center of the line to change its length and orientation.
Key Tips for Using Microsoft Word
- Learn keyboard shortcuts: When creating or editing documents, knowing how to copy, paste, and undo can save you a lot of time.
- To quickly find Words or phrases, use Ctrl + F: You can save time while searching for specific text in your document by using the “Find” feature. Rather than having to comb through lengthy paragraphs looking for a single Word, this tool displays every instance of the phrase right away and lets you amend or remove any unwanted content.
- Simply type a plus symbol (+) and hit the Tab key to quickly construct a table: This can save you from having to go via the “Home” page and shorten the time it takes to add lines.
- To control line, paragraph, and carriage breaks, click the “Home” tab and select the ´ symbol: By using this symbol, you can increase the visibility of line breaks in your document, making it easier to view and modify them.
Learn More Tutorial of MS Word Below:
Final Words for Insert a Vertical Line In Word
There you have it, then! You’ve become an expert at using several of Word’s methods to insert vertical lines. Remember that the perfect line is only a few clicks away, regardless of your preference for accuracy with forms, adaptability with borders, or fast tricks with tables and columns. Now go ahead, confidently split, arrange, and highlight your documents! For more support about MS Word visit Microsoft Support.
FAQs about Insert a Line In Word
Can you add a diagonal line in a Word document?
By drawing a line, you can add different types of lines, such as a diagonal line, in addition to horizontal and vertical ones. Go from the “Insert” tab to the “Shapes” menu. Select the choice for the diagonal line. Next, use the mouse to click and drag to adjust the diagonal line’s length.
How do you change the color of a line in Word?
After selecting the line, select “Format.” Click “More Outline Colors” to make your own, or select one of the pre-made colors for the line. You can also adjust the thickness and create a line dashed or dotted in the “Format” section.
What other shapes can you insert in a Word document?
Numerous shapes can be added to a Word document. To view all the choices, select “Shapes” under the “Insert” menu. You can incorporate the following shapes in a document:
Triangles, Boxes, Circles, Arrows, Rectangles, and Curves
![How to convert a Word doc into a Google Doc? | Easy Guide [2024]](https://techforgen.com/wp-content/uploads/2024/02/convert-a-Word-doc-into-a-Google-Doc-768x402.jpg)
![How To Get rid of Blue Paragraph Symbols in Word | Guide [2024]](https://techforgen.com/wp-content/uploads/2024/02/How-To-Get-rid-of-Blue-Paragraph-Symbols-in-Word-768x402.jpg)
![How To Remove Grey Highlight In Microsoft Word | Guide [2024]](https://techforgen.com/wp-content/uploads/2024/02/How-To-Remove-Grey-Highlight-In-Word-768x402.jpg)
![How to Add a Spanish accent in Microsoft Word | Guide [2024]](https://techforgen.com/wp-content/uploads/2024/01/How-To-Add-Spanish-Accents-In-Word-768x402.jpg)
![How To Anonymize Comments in Word | Complete Guide [2024]](https://techforgen.com/wp-content/uploads/2024/01/How-To-Anonymize-Comments-in-Word-768x402.jpg)
![How To Move Comments in Word | Complete Tutorial [2024]](https://techforgen.com/wp-content/uploads/2024/01/How-To-Move-Comments-in-Word-768x402.jpg)