
Elevate Your Writing: 11 Powerful Google Docs Formatting Features [2024]
Google Docs may look simple at first, but trust me – there’s way more to it than meets the eye! Seriously, it has some hidden tricks for making your work look awesome. Tired of those same old boring documents? These features can totally transform them!
Whether you’ve got an essay due or making a report for work, good formatting can make everything easier AND nicer to look at. Want a few shortcuts to make your Docs pop? Let’s go ahead! I’ll explain everything clearly so you can start trying them out today.
1. Styles: Your Formatting Shortcuts
Think of styles as presets for how your text looks, instead of manually selecting font, size, and emphasis each time.
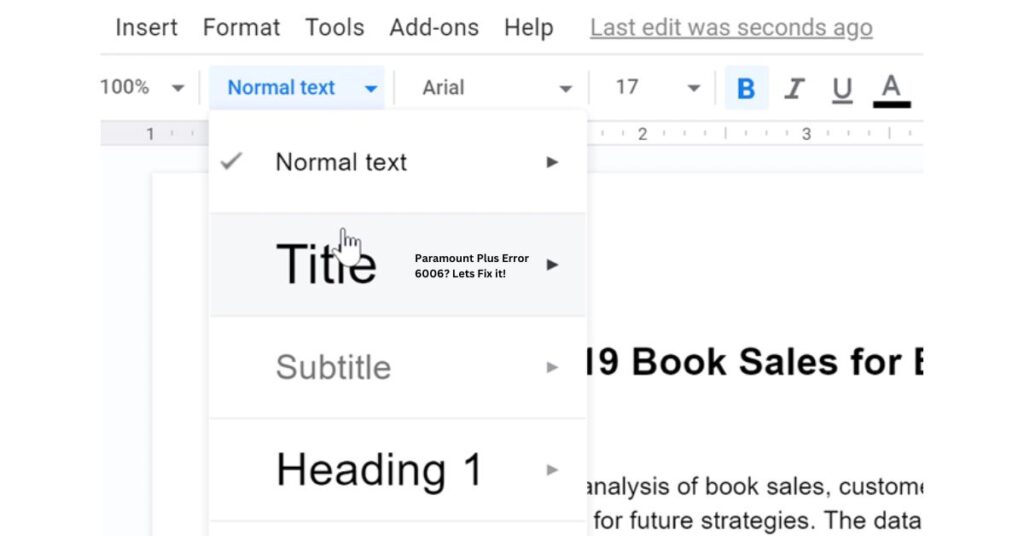
- Understanding Styles: You’ll find “Normal Text,” “Heading 1,” “Heading 2,” etc in the dropdown near the top-left of your doc. Apply different styles to see their effect.
- Modifying Styles: Right-click any style name in the dropdown, and click “Modify.” Here, you can change everything about how a style looks. Update “Heading 2” and watch all your Heading 2 text magically change at once!
2. The Magical Table of Contents
Long documents can be a labyrinth. Here’s how to add a navigation system:
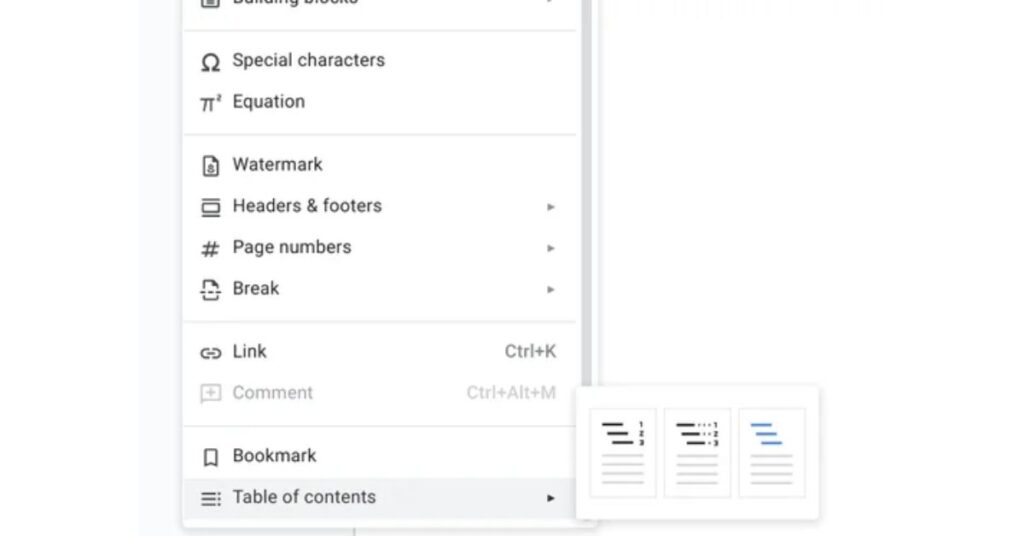
- Step 1: Use Headings: Make sure your sections have heading styles applied (“Heading 1,” “Heading 2,” etc.). This signals to Google Docs what’s important.
- Step 2: Insert the Table: Click where you want the table to appear. Go to “Insert” -> “Table of Contents” and choose the option with page numbers.
- Step 3: Keep it Updated: If you make changes to your headings, right-click on the Table of Contents and select “Update table of contents.”
3. Picture Perfect: Image Placement Made Easy
Images can disrupt your document’s flow if not handled correctly. Get precise control with these steps:
- Step 1: Insert Your Image: Go to “Insert” -> “Image” and choose where to get your image (upload, search the web, etc.).
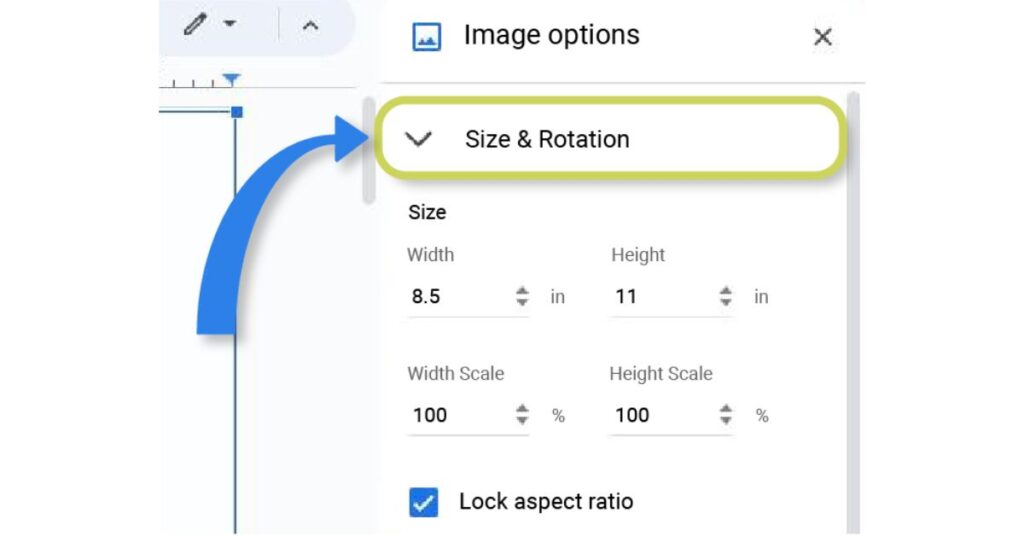
- Step 2: Right-Click Magic: Right-click the image and select “All image options.”
- Step 3: Text Wrapping: Under “Text Wrapping,” play with options like “Wrap Text” or “Break Text” to achieve different effects on how text behaves around the image.
- Step 4: Fine-Tune: The “Size & Rotation” tab lets you resize your image precisely or even rotate it.
4. Find and Replace: Overhaul Your Text in a Flash
Need to update repetitive text or fix widespread typos?
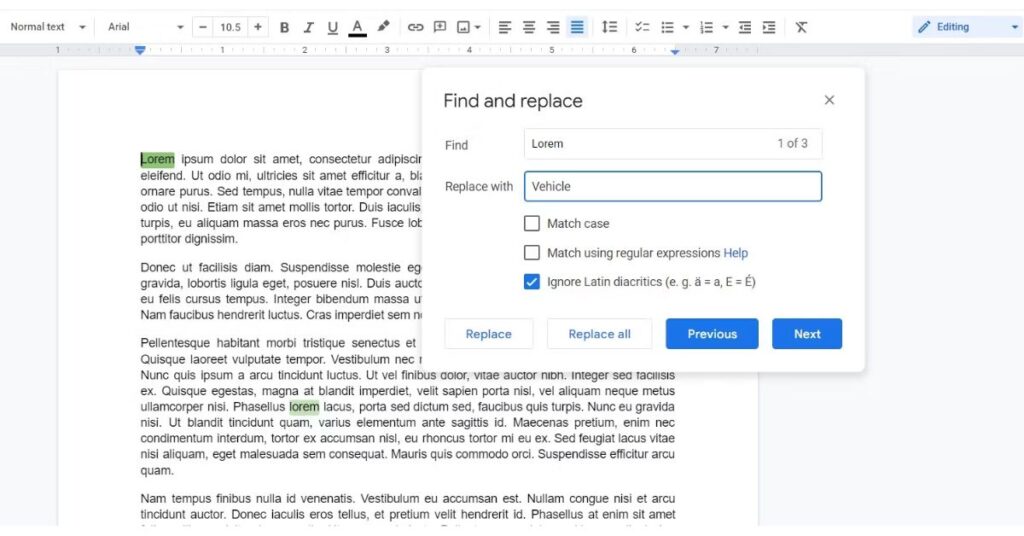
- Step 1: Open the Tool: Press Ctrl+H (Cmd+H on a Mac) or go to “Edit” -> “Find and Replace.”
- Step 2: Search and Replace: Type what you want to find in the “Find” box, and what should replace it in the “Replace With” box.
- Step 3: Choose Your Scope: “Replace” changes one instance, and “Replace All” conquers the entire document.
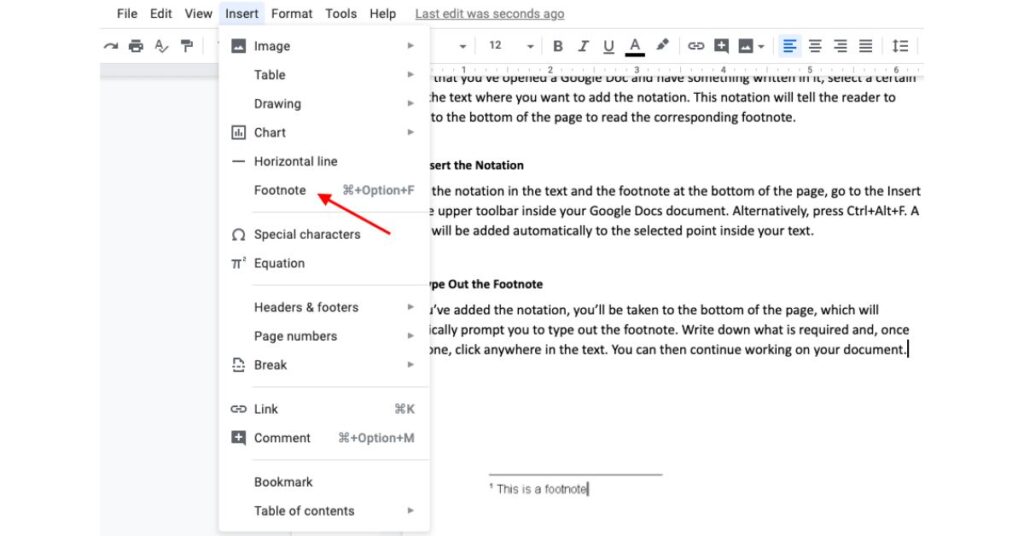
5. Fancy Footnotes
Footnotes are those superscript numbers that lead to extra info at the bottom – perfect for citing sources or giving a quick aside. Google Docs takes the hassle out of it.
How to add a footnote in Google Docs
- Place your cursor where you want that little number.
- Go to “Insert” and choose “Footnote.” Now type away in the little box at the page bottom!
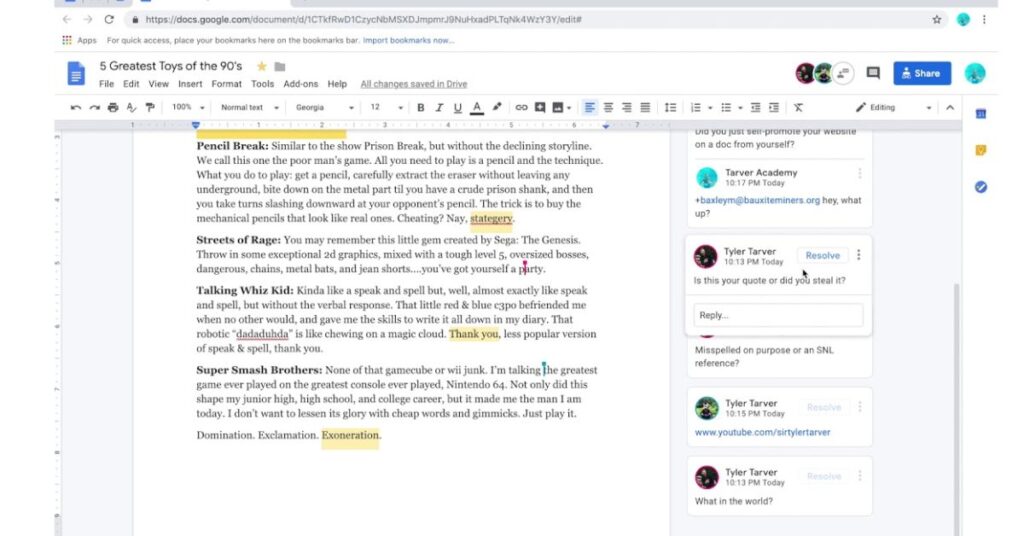
6. Let’s Collaborate! Commenting Power
Multiple people working on the doc? Comments are your lifeline! Don’t rewrite something – leave a comment instead. This keeps ideas flowing without versioning mayhem.
- Highlight the text you want to comment on.
- Click the little “+” speech bubble on the right or press Ctrl+Alt+M (Cmd+Option+M on a Mac). Leave your note and bam, teamwork has never been this smooth.
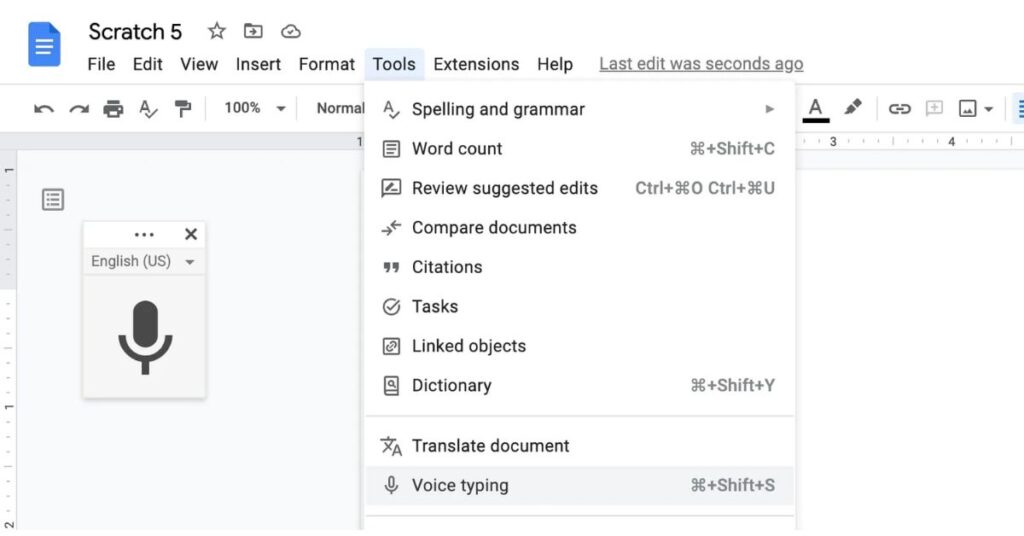
7. Voice Typing – For When Creativity Strikes
Ever get those bursts of genius mid-walk but forget it all by the time you find a pen? Voice typing to the rescue! It’s not always perfect, but it’s brilliant for catching that initial idea flow.
- Go to “Tools” and select “Voice Typing.”
- Click the microphone and just start talking – Google Docs does its best to keep up!
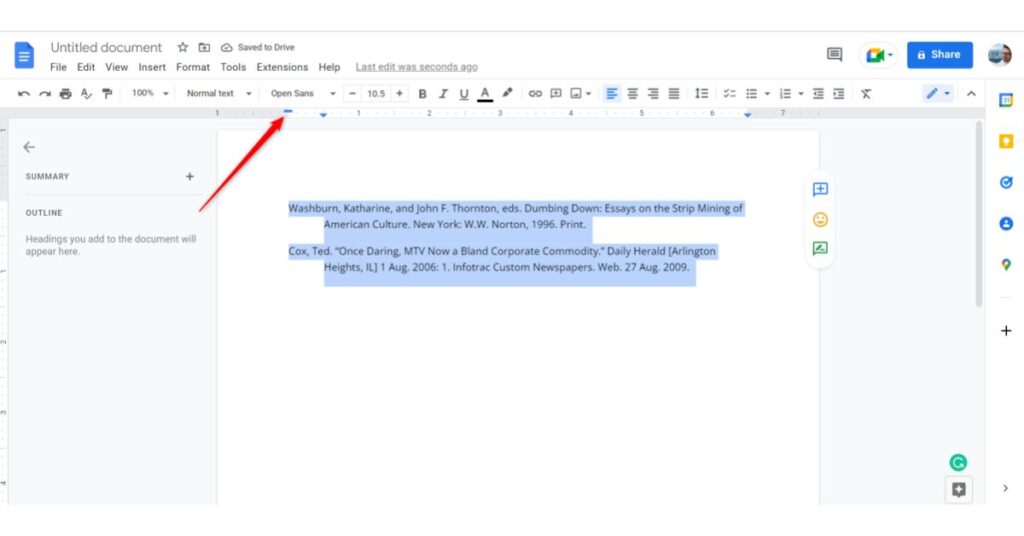
8. Hanging Indent
A hanging indent is a formatting style often used for citations and bibliographies. The first line of your text extends to the left, while subsequent lines are indented.
How to add a hanging indent in Google Docs
- Step 1: Select Your Text: Highlight the paragraph or paragraphs you want to format.
- Step 2: Locate the Ruler: If you don’t see it, go to “View” and check “Show Ruler.”
- Step 3: Find the Markers: On the ruler, you’ll see a blue rectangle and a downward-pointing triangle.
- Step 4: Create the Hanging Effect: Drag the bottom triangle (first-line indent) to the right while leaving the blue rectangle in place. Your text now has a hanging indent!
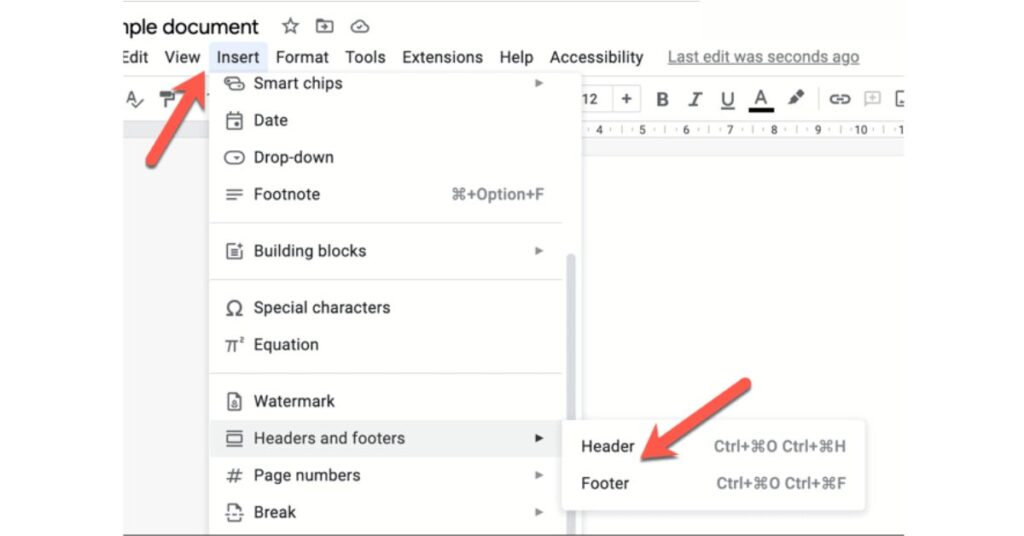
9. Customizing Headers and Footers
Perfect for page numbers, document titles, dates, etc., headers and footers live at the very top and bottom of your pages. Let’s control their margins:
- Step 1: Access the Header/Footer: Double-click anywhere in your document’s header or footer region.
- Step 2: Adjust the Ruler: You’ll notice the ruler at the top changes. This now only controls the header/footer area.
- Step 3: Move the Indent Markers: Drag the little triangles (indent markers) on this ruler left or right to set the margins for your header or footer content.
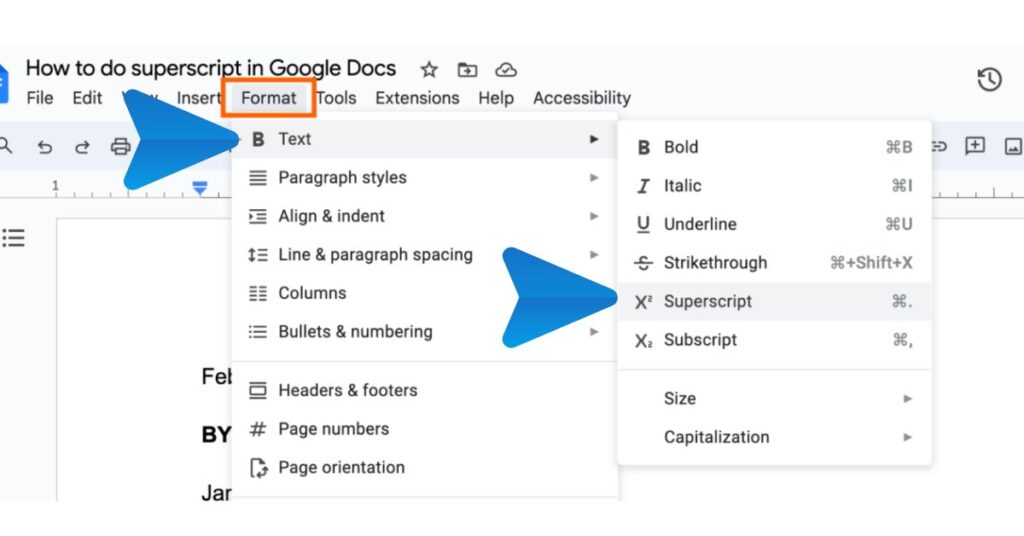
10. Subscript and Superscript (For Scientific Precision or Footnotes)
Sometimes, you need those tiny numbers tucked above (superscript) or below (subscript) the text line. Think chemical formulas (H₂O) or footnote indicators*. Here’s how:
How to do a subscript and superscript in Google Docs
- Highlight the text: Click and drag your mouse over the word or characters you want to change.
- Two ways to find the option:
- Menus: Go to the “Format” menu at the top, then choose “Text”, then select “Subscript” or “Superscript”.
- Keyboard Shortcut (Even faster!):
- Subscript: Press Ctrl + , (On a Mac, use Cmd + , )
- Superscript: Press Ctrl + . (On a Mac, use Cmd + .)
11. Fractions (For Math, Recipes, and Clarity)
Fractions can be tricky to type on a normal keyboard. Luckily, Google Docs makes it easy with a few different methods:
Method 1: The Easy Slash
- Type your numerator (top number), then a forward slash (/), then the denominator (bottom number). Example: 3/4
- Google Docs will often automatically turn this into a neat-looking fraction for you!
Method 2: Special Characters
- Go to “Insert” -> “Special Characters.”
- Search for “fraction” or browse the math symbols to find common fractions (½, ⅓, etc.).
- Click the fraction you want to add to your document.
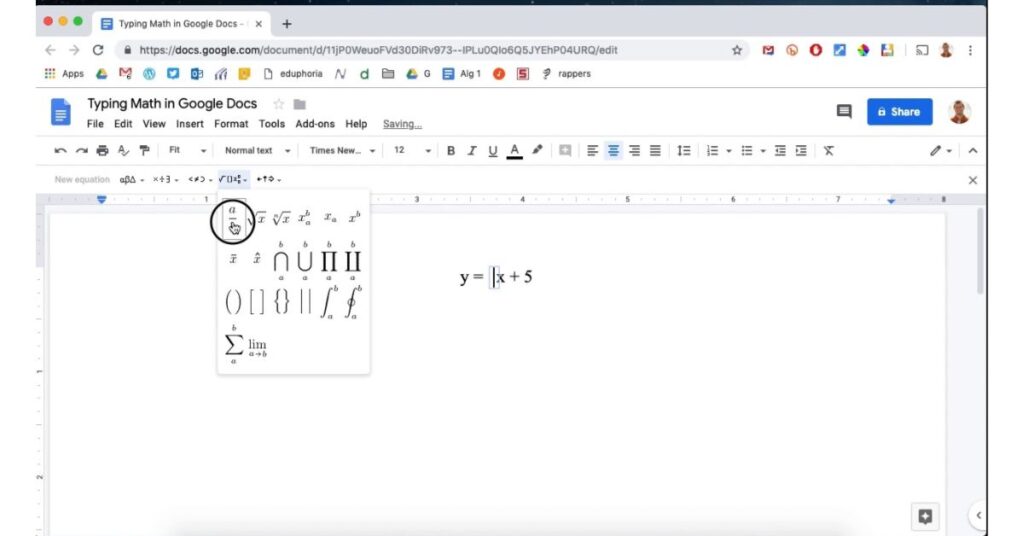
Method 3: Equation Tool (For Complex Fractions)
- Go to “Insert” -> “Equation.”
- Click the a/b icon (it looks like a fraction) on the toolbar.
- Type your numerator, press the down arrow key, then type your denominator.
In Summary
Google Docs might seem simple, but there’s so much more going on than you might think! A few clever formatting tricks can take your writing from plain to polished in no time. Whether you’re writing a report, an essay, or even just a to-do list, these features can make your work easier and more impressive. If you want to get more support for google docs, visit Google Docs Support.
FAQs
Can I create custom styles in Google Docs?
Absolutely! Right-click any style in the dropdown menu and select “Modify” to change its settings. You can even click “Save as a new style” to create a completely unique one.
Can the table of contents include headings with different styles?
Yes, Google Docs can accommodate multiple heading levels in your table of contents, letting you create a well-structured content hierarchy.
My images always shift when I add text – how do I fix this?
Play with the text wrapping options under “All image options” (right-click an image). The “Inline” setting usually makes the image behave like a big letter within your text.
Find and replace isn’t working – what might be wrong?
Check if you accidentally made the search case-sensitive (there’s a checkbox in the tool window). Also, make sure your formatting matches exactly in both boxes (italics, etc.).
Can multiple people leave comments on the same Google Doc at the same time?
Yes, Collaboration is one of Google Docs’ biggest strengths. You’ll see each person’s edits and comments appear in real-time.
How do I get the hanging indent ruler markers to appear?
Make sure the ruler is showing. If it’s not, go to “View” -> “Show Ruler.”
How do I see the word count on Google Docs?
It’s easy! Go to “Tools” -> “Word count” You’ll see a breakdown of pages, words, characters, and even characters excluding spaces.
How do I search for words in Google Docs?
There are two great ways:
Keyboard shortcut: Press Ctrl+F (Cmd+F on a Mac) to open the “Find” bar.
Through the menu: Go to “Edit” -> “Find and replace”
Type the word you’re looking for, and Google Docs will highlight every instance!
How do I see edit history in Google Docs?
Google Docs keeps track of changes! Here’s how to access the version history:
File Menu: Go to “File” -> “Version History” -> “See version history.”
Side Panel: A panel opens on the right showing edit timestamps. Click on one to view the document at that point in time.
How do I insert a checkbox in Google Docs?
Checkboxes are excellent for lists and tracking tasks. Here’s how to add them:
In a Document: Go to “Insert” -> “Checkbox”
Click where you want them to appear!
In a Table: Create a table.
Select the cells where you want checkboxes.
Go to “Insert” -> “Checkbox”
![How to convert a Word doc into a Google Doc? | Easy Guide [2024]](https://techforgen.com/wp-content/uploads/2024/02/convert-a-Word-doc-into-a-Google-Doc-768x402.jpg)
![How to Split Word Document In Half | Guide [2024]](https://techforgen.com/wp-content/uploads/2024/01/How-to-Split-Word-Document-In-Half-768x402.jpg)
![How to Add a Spanish accent in Microsoft Word | Guide [2024]](https://techforgen.com/wp-content/uploads/2024/01/How-To-Add-Spanish-Accents-In-Word-768x402.jpg)
![How To Get rid of Blue Paragraph Symbols in Word | Guide [2024]](https://techforgen.com/wp-content/uploads/2024/02/How-To-Get-rid-of-Blue-Paragraph-Symbols-in-Word-768x402.jpg)
![How To Remove Grey Highlight In Microsoft Word | Guide [2024]](https://techforgen.com/wp-content/uploads/2024/02/How-To-Remove-Grey-Highlight-In-Word-768x402.jpg)
![How To Insert a Vertical Line In Word | Complete Guide [2024]](https://techforgen.com/wp-content/uploads/2024/01/How-To-Insert-a-Vertical-Line-In-Word-768x402.jpg)